
To install a solar CCTV camera, start by selecting a location with plenty of sunlight during the day. This ensures the solar panel charges the battery effectively. Next, mount the camera on a stable surface, ensuring it is securely attached and positioned at the right angle for optimal coverage. Connect the camera to the solar panel, making sure all wiring is weatherproof to protect it from rain or extreme temperatures. Finally, test the camera to ensure it functions properly in various weather conditions. This easy installation can help save on electricity costs while keeping your property secure.
Tools and Materials Needed for Installing a Solar CCTV Camera
To install a solar CCTV camera, you will need the following tools and materials to ensure an efficient setup:
Essential Tools:
- Drill with various bits: Make holes for the mounting brackets and secure the camera and solar panel.
- Screwdrivers (Phillips and flat-head): For tightening screws to secure both the camera and solar panel.
- Wrenches or pliers: These are used to tighten connections and secure the solar panel and camera.
- Ladder or scaffolding: To reach higher installation points safely.
- Level: To align the camera and solar panel properly for best performance.
Key Materials:
- Solar CCTV camera system: Includes the camera, solar panel, and battery needed for operation.
- Mounting brackets and screws: To attach the camera and solar panel to walls or other structures.
- Solar panel mounting frame or pole: Helps position the solar panel for optimal sunlight exposure.
- Wires and connectors: To connect the solar panel to the camera for power.
- Durable screws and wall plugs: Suitable for securing the installation to your property’s exterior.
- Waterproof sealant: Protects against moisture and ensures long-term system durability.
- Cable clips or conduit: To organize and protect cables.
- Extension wires and adapters: To provide flexibility in placement, such as Type-C to Micro USB adapters.
- Battery charger cable: For charging the battery separately, if needed.
- Cable ties and screw caps: For additional security and cable management.
Optional but Helpful Additions:
- Universal pole mount: A versatile option for mounting the solar powered security camera and solar panel on round poles or tree branches.
- Weatherproof enclosure: Provides extra protection for the camera and other components from harsh weather conditions.
How to Install Solar CCTV Cameras?
Step 1: Choose the Right Location
- Identify a location with consistent sunlight throughout the day.
- Position the camera to cover key areas such as entry points or wide-open spaces.
- Avoid placing the camera too low or in easily accessible spots to prevent tampering.
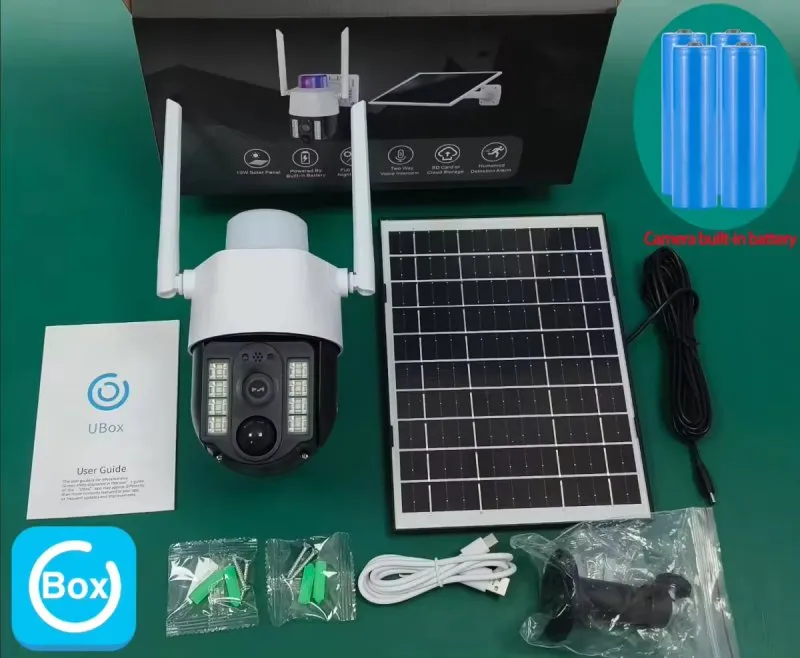
Step 2: Assemble the Components
- Unbox the solar camera kit and ensure all parts are accounted for.
- Follow the manufacturer’s instructions to attach the solar panel to its bracket.
- If required, connect the camera to the solar panel or battery system.
Step 3: Mount the Solar Panels
- Secure the mounting bracket using a drill and screws on a surface exposed to sunlight.
- Adjust the panel’s angle for optimal solar absorption, typically 30-45 degrees based on your location.
- Ensure the panel is firmly fixed and can withstand environmental conditions like wind or rain.
Step 4: Install the Solar Camera
- Use a sturdy mounting surface for the camera to ensure long-term stability.
- Align the camera for optimal coverage, using a level to maintain accuracy.
- Tighten screws securely and check for weatherproofing to protect against rain or dust.
Step 5: Connect and Power the System
- Plug the camera into the solar panel or battery pack, ensuring all connections are secure.
- Organize the cables neatly, using cable clips if needed, to prevent tangling or disconnections.
- Power on the solar powered cctv camera and confirm it receives energy from the solar panel.
Step 6: Configure the Solar Camera
- Install the manufacturer-recommended app on your smartphone or computer (e.g., ICSee or Tuya).
- Use the app to connect the camera to your Wi-Fi or 4G network.
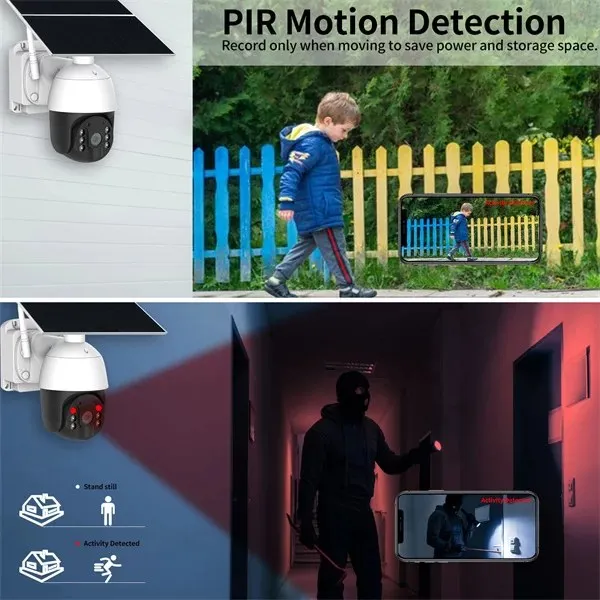
- Adjust settings like motion detection sensitivity, video quality, and notifications.
Step 7: Final Testing
- Check the live video feed to ensure proper functionality and clear visuals.
- Monitor the solar panel’s charging efficiency during sunlight hours.
- Walk around the coverage area to test motion detection and camera angle.
Common Issues When Installing Solar CCTV Cameras and How to Fix Them
When setting up solar panel CCTV cameras, several common issues can arise, but they can be easily fixed with some simple maintenance and adjustments.
1. Reduced Solar Power Generation
One main challenge with solar CCTV cameras is insufficient power generation on cloudy days or during periods of low sunlight. This can cause the camera to stop functioning properly.
- Solution: Install the solar panel in a location that gets maximum sunlight exposure. Regularly clean the solar panel to remove dust, dirt, or debris that could block sunlight. If power generation remains low, upgrade to a larger or more efficient solar panel for better performance.
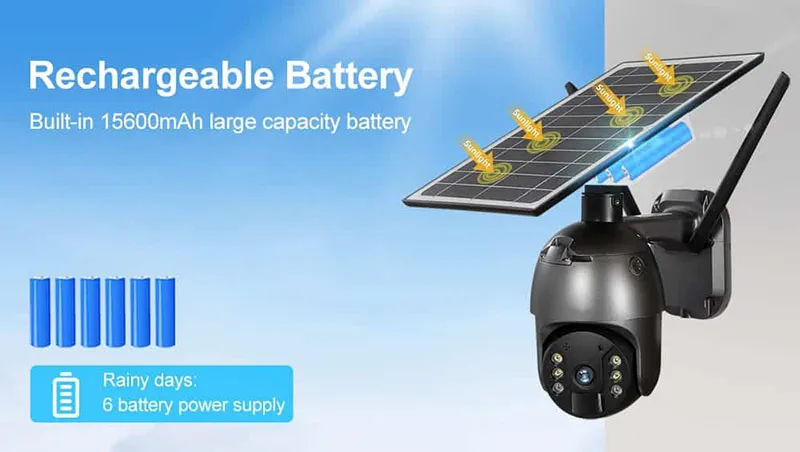
2. Battery Drain or Failure
The camera’s battery may drain quickly or fail to hold a charge, especially when there’s limited sunlight at night.
- Solution: Make sure the camera gets 3 continuous sunny days for the battery to fully recharge. If the issue continues, check the battery’s health and replace it if necessary. Regular battery maintenance helps ensure optimal performance.
3. Connectivity Issues
Weak 4G signals can disrupt the connection between the camera and the monitoring system, especially in areas with poor wireless coverage.
- Solution: Choose a reliable service provider that offers strong network coverage in your region. This helps minimize connectivity issues and ensures stable performance.
4. Water and Wind Damage
Exposure to water, such as flooding, can cause internal damage to the camera. Strong winds can dislodge or damage the camera if it’s not securely mounted.
- Solution: Install the camera in a weatherproof housing and ensure all cable connections are sealed against moisture. Position the camera in a spot protected from water accumulation. For wind damage, use a sturdy mounting bracket or pole and tighten all screws to prevent dislodgement.
5. Regular Maintenance Tips
Maintaining the solar security camera is essential for long-term performance.
- Clean the solar panels regularly to remove dust, snow, and debris, ensuring maximum efficiency.
- Inspect and seal all cable connections with waterproof connectors or weatherproof tape to protect against moisture and extreme temperatures.
- Update the camera’s firmware to ensure it runs with the latest features and security patches.
- Check the battery’s health regularly and replace it when necessary, especially during times with less sunlight.
- Perform regular maintenance checks to identify wear or damage early and prevent serious issues later.
By addressing these common issues and performing regular checks, your solar CCTV camera will function effectively and efficiently.
Conclusion
Installing a solar CCTV camera is an excellent way to enhance security while embracing sustainable technology. By following the steps outlined in this guide, you can ensure your camera is set up correctly for optimal performance and durability. Regular maintenance will keep your system running smoothly, providing peace of mind for years to come. Ready to upgrade your security system? Explore ICSEECAM’s range of high-quality solar CCTV cameras to find the perfect solution for your needs. Start securing your space with the power of the sun today!


5 Responses